Week 1
Inflatables
An inflatable is an object that can be inflated with a gas, usually with air, but hydrogen, helium and nitrogen are also used. One of several advantages of an inflatable is that it can be stored in a small space when not inflated, since inflatables depend on the presence of a gas to maintain their size and shape. Function fulfillment per mass used compared with non-inflatable strategies is a key advantage. Stadium cushions, impact guards, vehicle wheel inner tubes, emergency air bags, and inflatable space structures employ the inflatable principle. Inflation occurs through several strategies: pumps, ram-air, billowing, and suction. Although the term inflatable can refer to any type of inflatable object, the term is often used in boating to specifically refer to inflatable boats.
How To
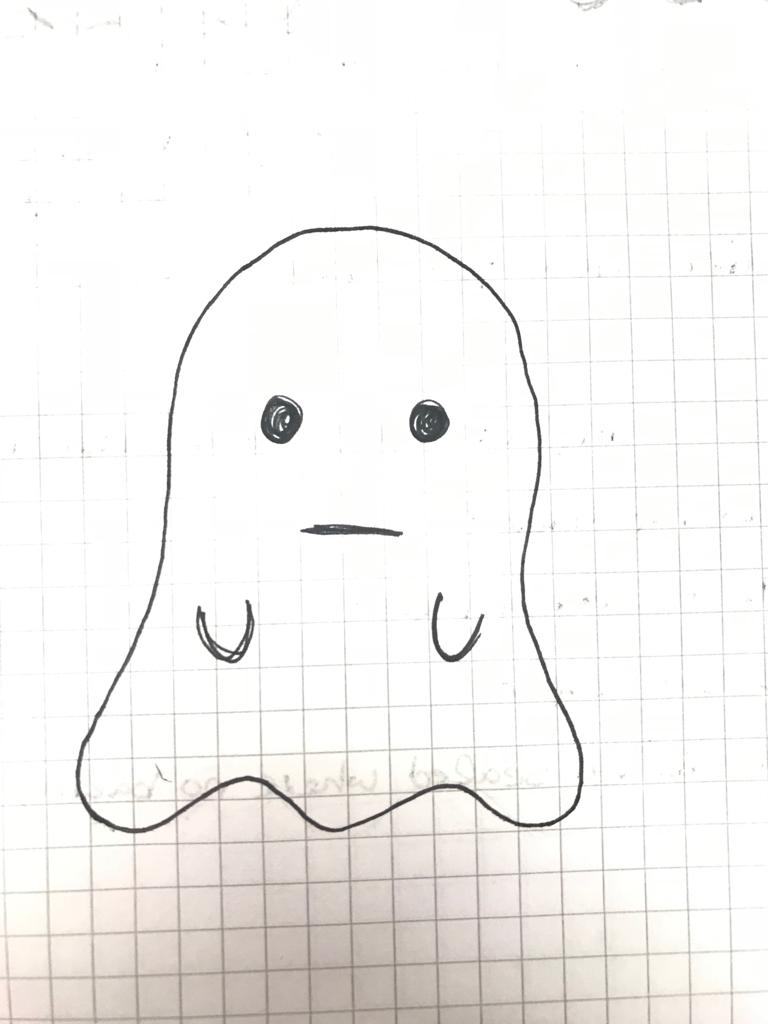
Step 1
In the first step, you have to think about A shape, a animal or something like that, you want to inflate. Therefor you can create your shape in illustrator or just draw it by hand.
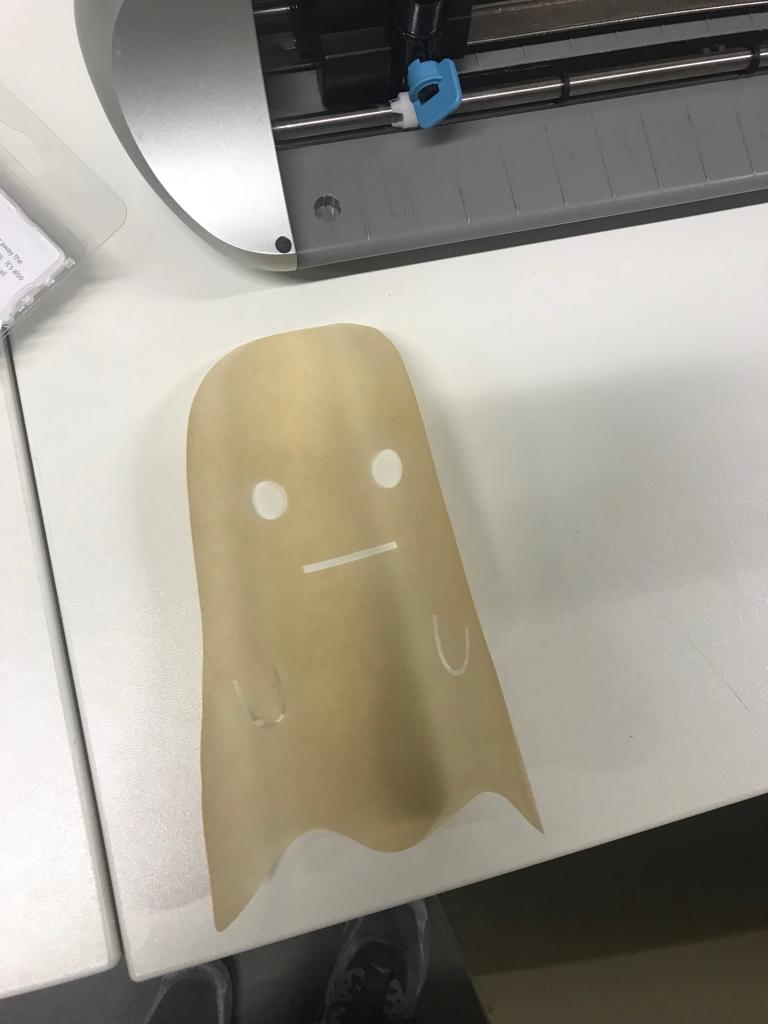
Step 2
Your shape consists of two shapes - one made of vinyl and the other one made of baking paper.
Step 3
In the next step you have to download the program Silhouette and open your file in it. (You can download the program here!)
Step 4
When everything is installed, you have to set up your dartboard to the size of your printing machine. In my case it was an A4 portrait format. Therefor you go to „Design" -> „Page set up“.
Step 5
For the machine there is a special board for printing, where you have to put on your baking paper. It should adhere well to the board, otherwise it is possible that it will be damaged.
Step 6
In the next step you will insert the board with the fixed baking paper into the printer and change the settings correctly.
Step 7
You have to change the speed an the force, according to the material you are going to use. For thicker materials will need a more higher speed and force than for thin materials. So for backing paper I used the a speed of „2“ and a force of „10“.
Step 8
After that you also have to change the speed of the printer manually. Therefor you have to rotate this small wheel. The speed should be the that you have also chosen in the Silhouette program.
Step 9
If you want, you could make a test in printing and see if everything works. If it do so, you can go and press send.
Step 10
Now your baking paper shape will be ready and you can start printing your shape on the vinyl. Therefor you open the second file you have created and put it again on the digital artboard.
Step 11
VERY IMPORTANT!
Vinyl should be put in the printer, with the dull side up.
Step 12
In the next step you go again to the settings and set them. Now I have housed a speed of 4 and a force of 15.
Step 13
Again you can make a test in printing and see if everything will work. If it do so, you can go and press send.
Step 14
You will repeat it, and send to print for a second time, because you will need two similar parts (back and front).
Step 15
When everything is printed you have to combine all shapes.
VINYL-BAKING PAPER - VINYL
Step 16
Then you go an put it in the „Hot Press“. Here it is very Important, that you will put baking paper under and above your vinyl shapes, because otherwise the hot press could melt the vinyl.
Step 17
You have to leave your shape in it for about 15 seconds, put it out and let it cool down.
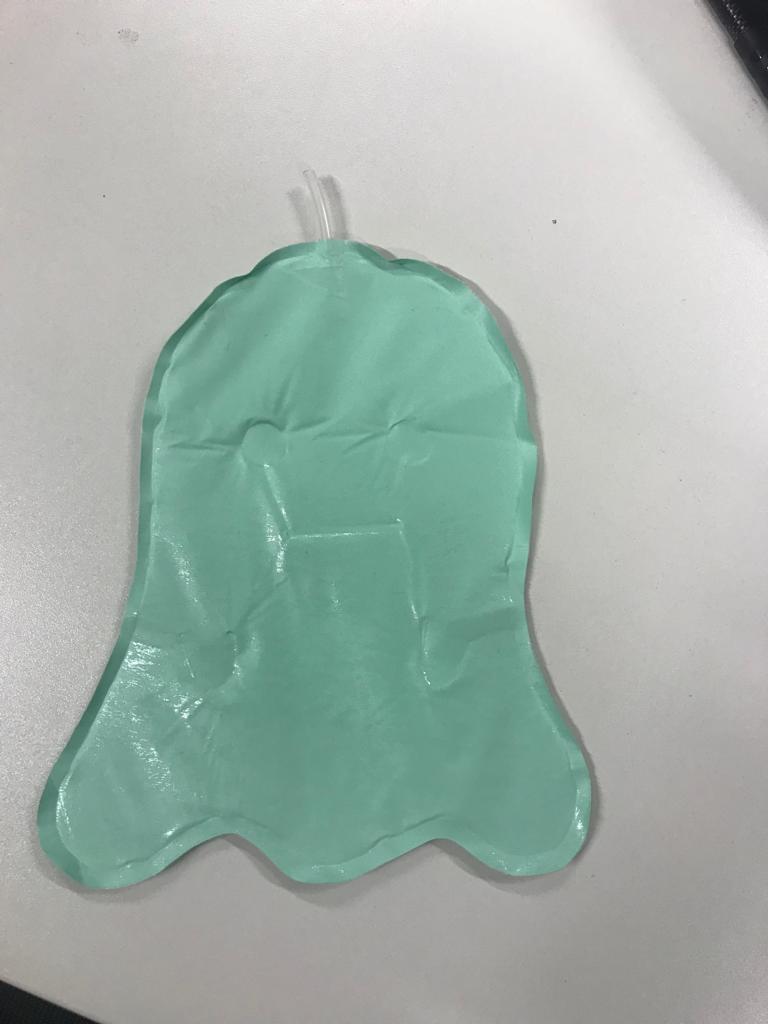
Step 18
As a last step, we just have to opt the tube in the hole for the air supply.
Step 19
If you have done everything correctly, your inflatable should look like this now.